
Home »
Valve Parts: Essential Components for Industrial Systems
Table of Contents
- Understanding Valve Parts and Their Critical Role
- Major Components of Industrial Valves
- Valve Repair Kits and Maintenance Strategies
- Industrial Valve Maintenance Best Practices
- Automated Valve Actuator Parts and Control Systems
- Compatibility and Replacement Part Selection
- Why Valve Part Quality Matters for Operations
- Frequently Asked Questions
Last Updated: October 2, 2026
Understanding Valve Parts and Their Critical Role
Industrial valve parts form the backbone of fluid control systems across oil and gas, chemical processing, water treatment, and food and beverage production. The market size for valve manufacturing in the United States reached $37.9 billion in 2026, representing a 4.2% increase year-over-year IBISWorld valve manufacturing data. Understanding the critical components that make up industrial valves isn’t just technical knowledge, it’s essential for preventing costly operational failures.
Unplanned shutdowns caused by industrial valve failures cost facilities an average of $67,000 per incident, with 23% of manufacturing shutdowns directly attributable to valve failures Oxmaint industrial valve failure analysis. That’s why procurement managers, maintenance engineers, and operations teams need to understand what makes a valve work, what breaks, and how to select replacement components that actually perform under real-world conditions.
Valtorc International has spent over 40 years sourcing and engineering valve solutions for demanding applications. The difference between a valve that lasts and one that fails prematurely comes down to understanding component parts and selecting the right replacements.
Major Components of Industrial Valves
Industrial valves are built from interconnected components that control flow, regulate pressure, and maintain system integrity. Understanding these parts helps you troubleshoot problems, order correct replacements, and avoid compatibility issues.
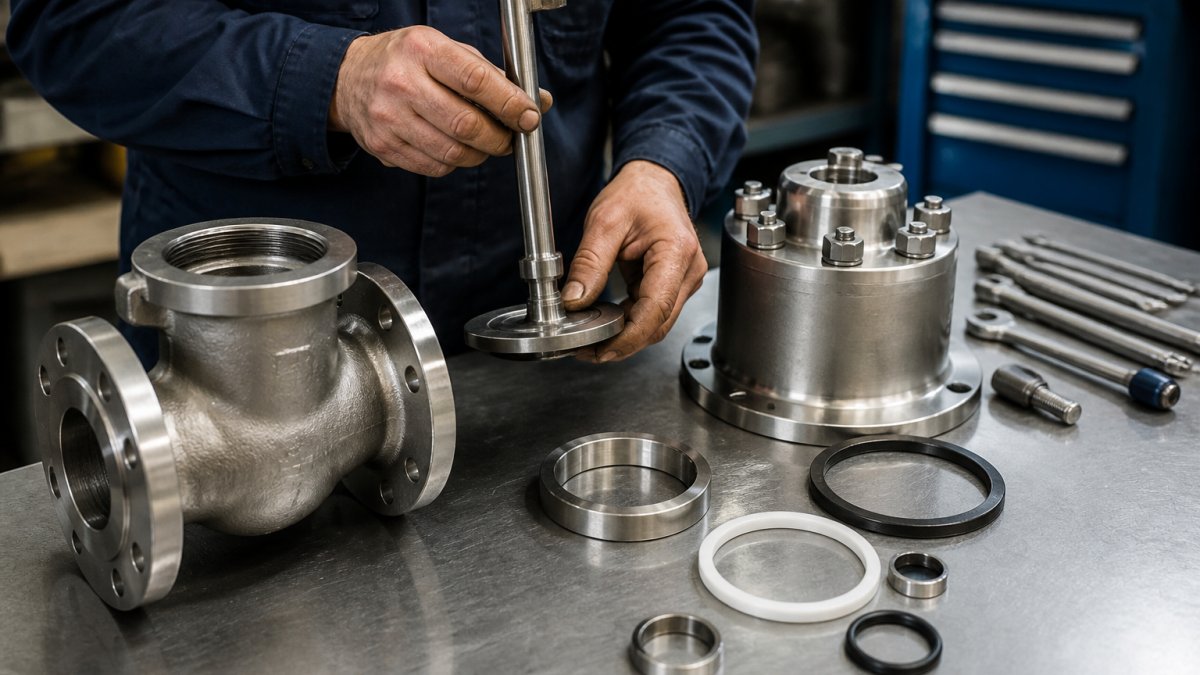
Body and Bonnet Assembly
The valve body is the main pressure-containing vessel where flow control occurs. The bonnet is the removable top section providing access for maintenance and housing the stem guide and packing elements. Together they form the structural foundation.
Material selection matters: cast iron for lower pressures, stainless steel for corrosion resistance, ductile iron for moderate-pressure systems. When ordering replacements, verify the material specification matches your original equipment, substituting materials compromises performance and safety.
Sealing Elements and Gaskets
Gaskets and sealing elements prevent leakage at connection points and internal valve surfaces. O-rings, packing materials, and diaphragms create the seals that keep your system tight. A ball valve that failed to meet fugitive emission sealing requirements after just 100 mechanical cycles did so because of packing issues ScienceDirect valve sealing failure research, a reminder that sealing components aren’t afterthoughts.
Non-OEM parts cost less but may not meet rigorous qualification standards for critical applications. When ordering a valve parts kit, verify gaskets and sealing elements match original specifications. Material compatibility matters: EPDM gaskets work for different fluids than Viton, and choosing wrong causes swelling, degradation, or leakage.
Stem, Disc, and Seat Components
The stem connects the handle or actuator to the disc. The disc blocks or allows flow. The valve seat is the stationary surface where the disc seals when closed. These three components form the core flow-control mechanism.
Stem guides and bushings keep the stem centered and prevent binding. Springs return the disc to its seated position. Fatigue fractures are a primary cause of early valve failure in compressors, often originating from manufacturing defects in these high-stress components Purdue University valve failure analysis. When you’re sourcing stem and disc replacements, material hardness and dimensional precision are non-negotiable.
When replacing stems or discs, always replace the valve seat at the same time. A worn seat will quickly damage a new disc, wasting the replacement and creating leakage. Treating these as a matched pair extends component life significantly.
Valve Repair Kits and Maintenance Strategies
A complete valve repair kit contains gaskets, o-rings, packing, springs, and sometimes a replacement disc and seat. These kits simplify maintenance by bundling exact components for a specific valve model. Knowing which kit to order and how to install it correctly separates success from costly mistakes.
Identifying the Right Repair Kit for Your Valve
Confirm your valve’s exact model number, size, and pressure rating from the nameplate or equipment documentation. A 2-inch ball valve rated for 300 psi requires different sealing materials and dimensions than one rated for 150 psi, despite looking similar externally.
Cross-reference the model number against the kit supplier’s compatibility matrix. A typical ball valve repair kit includes stem packing (PTFE or graphite-impregnated), bonnet o-rings (Viton or EPDM), seat seals, springs, retainers, and bonnet gasket material.
Model-specific kits are engineered for exact fit and prevent installation errors.
Step-by-Step Installation Process
1. Isolate and depressurize the valve. Close isolation valves upstream and downstream, open the valve fully to relieve pressure. If hazardous fluid is present, flush with compatible solvent and dry completely. Skipping this step is the leading cause of injury.
Preventive Maintenance Using Repair Kits
Proactive maintenance extends valve life. Schedule kit replacements during planned shutdowns based on valve type and operating conditions. Keep critical kits in inventory to minimize response time during maintenance.
Repair kits are most effective when applied proactively during scheduled maintenance windows, not reactively after failure. Match kit replacement frequency to your valve type and operating conditions, and keep critical kits in inventory to minimize response time.
Industrial Valve Maintenance Best Practices
Conduct quarterly visual inspections for external leakage, corrosion, or discoloration. Document operating conditions (pressure, temperature, flow, fluid type) to predict when replacement valve parts will be needed. Lubricate stem guides annually with compatible grease. Schedule packing replacement every 2-3 years in high-cycle applications. Keep maintenance records to distinguish premature failure from normal wear.
Automated Valve Actuator Parts and Control Systems
Automated valves use pneumatic, hydraulic, or electric actuators. Critical actuator parts include solenoids (controlling pilot pressure), positioners (fine-tuning response), and trim components (regulating pressure to the actuator). When sourcing parts, verify voltage compatibility, pressure ratings, and response time specifications. Valtorc International designs custom-engineered automated valve packages with matched components.
Never mix actuator parts from different manufacturers without verifying compatibility. A pneumatic positioner from one brand may not integrate properly with a solenoid from another, causing sluggish response or complete failure. Stick with matched component sets or consult engineering support.
Compatibility and Replacement Part Selection
Incompatible parts waste money and delay operations. Compatibility checking requires the original valve model number, valve size (port diameter), and pressure and temperature rating.
The Model Number: Your Compatibility Blueprint
The model number determines which components fit. A 2-inch ball valve from one manufacturer won’t accept internal parts from another, bonnet height, stem diameter, disc bore, and seat cavity dimensions differ by design. Find the model number on the valve nameplate or equipment documentation. Use it to access the manufacturer’s parts breakdown diagram, which shows every component with its part number, material specification, and assembly sequence.
Pressure and Temperature Ratings: Material Selection Rules
Pressure and temperature ratings determine safe materials. Viton gaskets degrade above 400°F; PTFE handles higher temperatures but requires higher bolt torque. Springs designed for 150 psi lose temper at 300 psi, causing disc drift. Always verify replacement components match your original valve’s pressure and temperature rating. A five-minute verification call beats a shipment of incompatible parts.
Cross-Reference Verification: The Compatibility Matrix
Many suppliers publish compatibility matrices, tables or searchable databases showing which parts fit which valves. These are invaluable tools for verification before ordering. A typical matrix looks like this:
| Valve Model | Bonnet Gasket | Stem Packing | Seat Seal | O-Ring Kit | Pressure Rating | Temperature Range |
|---|---|---|---|---|---|---|
| BV-1-SS-150 | BG-1-V | SP-1-G | SS-1-V | OR-1-V | 150 psi | -20°F to 200°F |
| BV-2-SS-300 | BG-2-V | SP-2-G | SS-2-V | OR-2-V | 300 psi | -20°F to 300°F |
| BV-2-SS-600 | BG-2-H | SP-2-H | SS-2-H | OR-2-H | 600 psi | -20°F to 400°F |
OEM vs. Aftermarket Parts: The Trade-Off
OEM parts guarantee exact fit and performance. Aftermarket parts may cost less but can cut corners on quality. For critical applications, specify OEM or aftermarket parts meeting relevant industry standards. Reputable suppliers state which standards their parts meet.
Dimensional Verification: When to Measure
If the model number is unavailable, measure port diameter, bonnet height, stem diameter, and seat cavity diameter. Provide measurements and a photo to the supplier. This approach is slower and less reliable than having the original model number, so use it as a last resort.
Pre-Order Checklist
Before ordering, verify model number, pressure rating, temperature rating, port size, material specifications, supplier compatibility confirmation, and lead time. This 10-minute checklist prevents the 90-minute scramble to return incompatible parts.
Never assume that parts from different manufacturers are interchangeable based on size alone. A 2-inch ball valve from Manufacturer A will not accept internal parts from Manufacturer B without modification. Always verify compatibility using the model number and the manufacturer’s parts breakdown diagram.
Why Valve Part Quality Matters for Operations
Quality valve parts are engineered to specification and tested under real operating conditions. The industrial valve market is driven by demand for high-pressure components. Valtorc International manufactures valve parts designed to exact specifications, backed by 40+ years of expertise.
Frequently Asked Questions
What are the most common valve parts that fail in industrial applications?
Gaskets, o-rings, packing, and valve seats are the most frequently replaced components due to wear from pressure cycling and fluid exposure. Stems and spindles experience fatigue fractures, often originating from manufacturing defects. According to industry data, unplanned manufacturing shutdowns caused by industrial valve failures occur in 23% of cases, with average incident costs reaching $67,000. Regular inspection of these sealing elements and trim components prevents costly failures.
How do I identify the correct replacement parts for my valve?
Locate the valve’s model number, pressure rating, and material specifications on the nameplate or documentation. Cross-reference these details with manufacturer specifications for trim components, actuator parts, and sealing elements. For automated valve actuator parts, verify solenoid voltage and control signal compatibility. Direct-from-manufacturer sources provide accurate cross-reference guides and compatibility charts. When in doubt, consult technical documentation or contact the original equipment manufacturer to ensure non-OEM parts meet your application’s fugitive emission and performance standards.
What’s the difference between valve trim and valve body components?
The valve body is the main pressure boundary containing the bonnet, port connections, and cavity. Trim components include the disc, seat, stem, guides, bushings, and all internal sealing elements that control fluid flow. Trim components wear faster and are typically replaced during maintenance without replacing the entire valve body. Understanding this distinction helps optimize maintenance costs, often only trim components need replacement, not the entire valve assembly.
Why should I use OEM-certified valve parts instead of non-OEM alternatives?
OEM-certified parts meet rigorous qualification standards specific to your valve’s application. OEM parts ensure compatibility with hydraulic systems, pneumatic controls, and pressure regulation requirements. For critical applications like oil and gas refineries or food and beverage production, OEM certification can provide documented compliance with safety and regulatory standards.

CREDIT APPLICATION
Please fill out our credit application for purchase orders and net terms. Download here

DISTRIBUTORS WANTED
Apply to become an official protected distributor. Click here to fill out our distributor application. (Online Form)

VALVE PRODUCT CATALOG
New! Download our 2018 product overview catalog or call us to request a copy. Click here to download (PDF)


